YouTube · Ali Raja Bagan Bari Uk · 25 October 2026
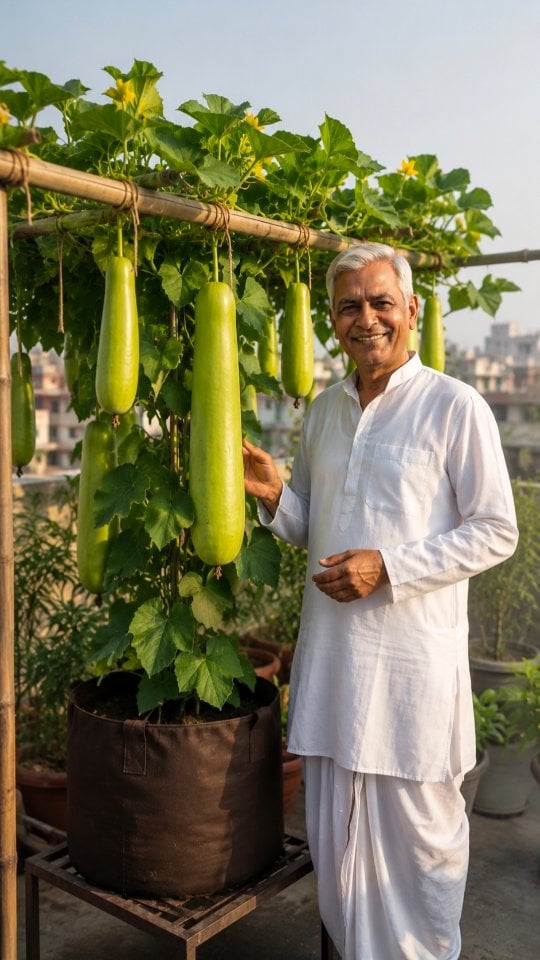
Growing bottle gourd from seed to harvest
This guide covers how to germinate bottle gourd seeds, plant them successfully, and then nurture the plants with organic feeding and pruning techniques to maximize your harvest.
Quick answer
To grow bottle gourd, start by germinating hybrid seeds through scarification or overnight soaking. Plant them 0.5 inch deep in warm, humid conditions. Once established, feed every 15 days with a homemade liquid fertilizer, use pheromone traps for fruit fly control, and prune growing tips to encourage more female flowers and a bountiful harvest.
The idea
To successfully grow bottle gourd from seed and achieve an abundant harvest, begin with high-quality hybrid seeds. Follow one of two effective germination methods, ensure proper planting, and then implement ongoing care including organic pest control, consistent feeding with homemade fertilizer, and strategic pruning.
Method 1: Quick Germination (3-5 days)
- Scarify the seeds: Use a nail clipper to carefully clip off the pointed ends of the bottle gourd seeds. The goal is to expose the white inner part of the seed without damaging the embryo. Clip both the leaf end and the root end at a slight angle, just enough to see the seed inside.
- Prepare the tissue: Get a kitchen tissue and fold it into a square shape.
- Place the seeds: Lay the scarified seeds onto the center of the folded tissue, about half an inch apart.
- Moisten: Fold the tissue over the seeds. Soak the tissue with the seeds in a bowl of water, then gently squeeze out any excess water so it is damp but not dripping wet.
- Create a mini-greenhouse: Place the damp tissue with seeds inside a plastic bag and seal it.
- Provide warmth: Place the sealed bag in a warm location, such as a heated seed propagator, a boiler room, or near a central heating radiator. Maintain a temperature between 25-30°C (77-86°F).
Method 2: Overnight Soaking
- Prepare the soak: Fill a bowl with water and add a teaspoon of Epsom salt.
- Soak the seeds: Place the bottle gourd seeds into the water and Epsom salt mixture. Leave them to soak overnight.
Planting the Germinated Seeds
- Prepare pots: Fill small containers with pre-dampened compost.
- Plant the seeds: For seeds germinated using Method 1 (with visible shoots) or Method 2 (soaked seeds), create a small hole in the center of the compost. Plant each seed about half an inch deep, ensuring the pointed end (or the emerging root for germinated seeds) faces downwards.
- Water: Gently water the newly planted seeds.
- Retain moisture: Place each potted seed inside a plastic bag or cover with a plastic dome to retain moisture. Alternatively, place them in a heated propagator.
- Provide warmth: Keep the potted seeds in a warm location, similar to the germination phase, until shoots emerge.
Ongoing Care for Maximized Yield
- Pest Control (Fruit Flies): Hang pheromone traps near your bottle gourd plants to control fruit flies. These traps attract male fruit flies, preventing them from mating and laying eggs.
- Homemade Liquid Fertilizer: Combine approximately 0.5-1 liter of boiled rice water with a mix of kitchen waste such as potato peels, cucumber peels, banana peels, and onion peels. Add about 3-4 liters of water to this mixture. Let it sit for 4-5 days to allow the peels to decompose and release nutrients. Apply this fermented liquid fertilizer every 15 days by digging a small trench about 1.5 feet away from the main stem of the plant, pouring the entire mixture (including the decomposed peels) into the trench, and covering lightly with soil.
- Pruning: Regularly pinch off or cut the growing tips of new branches. This encourages the plant to produce more lateral branches, which typically bear a higher proportion of female flowers.
Which plants this suits
- Bottle gourd (Lagenaria siceraria)
- Does not suit: Plants that prefer cooler climates or do not require extensive pruning for fruit production.
Why it works
Hybrid seeds are bred for higher yields and disease resistance, leading to more productive plants. Scarification and soaking help to break down the hard outer shell of the bottle gourd seeds, allowing water to penetrate more easily and initiating the germination process, significantly speeding up sprouting. Epsom salt provides magnesium, a nutrient that supports healthy plant growth and can aid in seed germination. Maintaining a warm, humid environment mimics the tropical conditions bottle gourds thrive in, encouraging rapid and successful germination and early growth.
Pheromone traps specifically target and eliminate male fruit flies, disrupting their breeding cycle organically and preventing them from destroying young gourds. A homemade liquid fertilizer made from kitchen waste provides essential nutrients, particularly potassium, which is crucial for flowering and fruiting. Regular application ensures the plant has a steady supply of these nutrients. Finally, pruning the tips of new branches encourages the plant to produce more side shoots, which in turn bear a higher number of female flowers, leading to more fruit set.
Try it
- Choose seeds: Select high-quality hybrid bottle gourd seeds for the best yield potential.
- Germinate: Choose your preferred method: either scarify your bottle gourd seeds with nail clippers (clipping both ends slightly to expose the inner seed) or soak them overnight in water with a teaspoon of Epsom salt.
- Prepare pots: Fill small pots with pre-dampened compost.
- Plant: Plant the germinated or soaked seeds about 0.5 inch deep in the compost, ensuring the pointy end (or the root if already visible) faces downwards.
- Water: Water gently after planting.
- Warmth and humidity: Cover each pot with a plastic bag or dome to create a humid microclimate. Place them in the warmest spot in your home, aiming for 25-30°C (77-86°F). This is ideal for planting in late winter or early spring in tropical climates like India, preparing for summer/monsoon growth.
- Monitor germination: Check daily for shoots. Scarified seeds should sprout within 3-5 days, while soaked seeds may take up to 10 days. Once shoots appear, remove the plastic cover.
- Light: Move the young seedlings to a sunny windowsill or under grow lights.
- Harden off: Before transplanting outdoors, gradually expose your plants to outdoor conditions over 7-10 days. This is crucial when temperatures are consistently warm and all danger of cold snaps has passed, typically by late spring or early summer.
- Transplant: Once hardened off, transplant your bottle gourd plants into their final outdoor growing location, ensuring they have ample space and support for climbing.
- Install pest control: Hang one or two pheromone traps per plant area near your bottle gourd plants to control fruit flies, especially as flowering begins.
- Prepare and apply fertilizer: Every 15 days, prepare your homemade liquid fertilizer (0.5-1 liter boiled rice water + kitchen peels + 3-4 liters water, fermented for 4-5 days). Dig a trench 1.5 feet from the main stem, pour the mixture into it, and cover lightly with soil.
- Prune: Regularly pinch off or cut the growing tips of new branches to encourage more side shoots and female flowers, especially during the main growing season (summer/monsoon).
- Observe results: Over the next few weeks, watch for a significant increase in female flowers and the subsequent development of numerous bottle gourds. Continue feeding and pruning throughout the growing season for sustained yield.
Watch out for
- Do not clip too deeply when scarifying seeds, as this can damage the delicate embryo and prevent germination.
- Ensure the compost is consistently moist but never waterlogged, which can lead to fungal diseases and rot.
- Avoid transplanting bottle gourd plants outdoors too early, as they are very sensitive to cold temperatures and frost.
- Always harden off your seedlings gradually before moving them permanently outdoors to prevent transplant shock and ensure their survival.
- Ensure the pheromone traps are replaced according to the manufacturer's instructions to maintain effectiveness.
- While the homemade fertilizer is organic, ensure it's well-fermented and diluted as described to prevent any potential root burn.
- Avoid over-pruning, which can stress the plant. Focus on pinching off just the growing tips of new shoots.